The Challenge: The Case of the Disappearing Button
At TechWave Solutions, a rapidly growing tech startup, excitement filled the air as the team launched a major update to their flagship project management tool, WorkWave. However, their celebration quickly turned to concern when users reported a critical issue: the “Submit” button on the main form was mysteriously disappearing. This button was vital for users to submit project updates, yet it seemed to vanish without a trace.
Led by Sarah, the development team embarked on a quest to uncover the cause of this perplexing problem. Despite passing unit tests with flying colors and E2E tests showing no signs of trouble, the button continued to elude them. After some investigation, they discovered that the button was getting hidden behind a div element, rendering it inaccessible to mobile users.
While the QA team had diligently verified and signed off on everything in desktop mode, Yet, here was a glaring problem that had slipped through the cracks. The team needed a solution, and fast.
Discovering Visual Testing
Sarah gathered her team for a brainstorming session. Amid the discussions, Liam, a senior developer, suggested visual testing. “We need a way to catch visual discrepancies that our current tests are missing,” he said. “Visual testing could be the answer.”
Visual testing, Liam explained, captures snapshots of the app’s appearance and compares them to the current state. This approach could catch issues like the disappearing button, which standard unit and E2E tests failed to detect.
Step 1: Setting Up the Environment
Excited by the prospect, the team decided to implement visual testing using Playwright. The first step was to set up the necessary dependencies. Sarah instructed the team to install Playwright and create a sample test file.
# Install node dependencies
npm install -D typescript
npm install -D @playwright/test

# Install playwright browsers
npx playwright install --with-deps

# Create the test file
mkdir -p tests
touch tests/homepage.spec.ts
With the dependencies in place, the team was ready to write their first visual test.
Step 2: Writing the First Visual Test
Sarah assigned Olivia, a junior developer, to write the initial visual test. Olivia opened tests/homepage.spec.ts and added the following code:
import { test, expect } from '@playwright/test';

test('home page visual test', async ({ page }) => {
  await page.goto('https://www.workwave.com');
  await expect(page).toHaveScreenshot();
});
This simple test navigated to WorkWave’s homepage and took a snapshot, comparing it to a previously stored baseline.
Step 3: Running the Visual Tests
With the test written, it was time to run it. Olivia executed the following command:
npx playwright test homepage.spec.tsThe first run failed, displaying an error:

But now, you will see a new directory had been created inside tests which includes your first snapshot file in .png format :

This was expected, as there was no baseline snapshot to compare against. Olivia ran the tests a second time:
npx playwright test homepage.spec.tsThis time, the tests passed successfully:

Step 4: Updating Test Snapshots
The visual test now confirmed that the page hadn’t changed. But Sarah knew updates were inevitable. To prepare for this, the team needed to know how to update their snapshots. Liam demonstrated:
npx playwright test -uThis command updated all snapshots to match the current state. Liam cautioned the team to use it carefully, as it could unintentionally update snapshots they didn’t mean to.
To update snapshots for specific tests, they used filtering options:
# Update tests with matching file name
npx playwright test -u "**/home*.spec.ts"

# Update tests with matching test name
npx playwright test -u --grep "home" --grep-invert "zzz"

# Update tests within project
npx playwright test -u --project "chromium"
Step 5: Debugging Visual Tests
The team needed to understand how to debug visual tests effectively. Sarah updated a test to create a failing scenario, simulating a bug where the snapshot wouldn’t match:
test('home page visual test', async ({ page }) => {
  await page.goto('https://www.workwave.com');
  await expect(page).toHaveScreenshot({
    // crop the screenshot to a specific area
    clip: { x: 0, y: 0, width: 500, height: 500 },
  });
});
They ran the tests with an HTML report for better debugging:
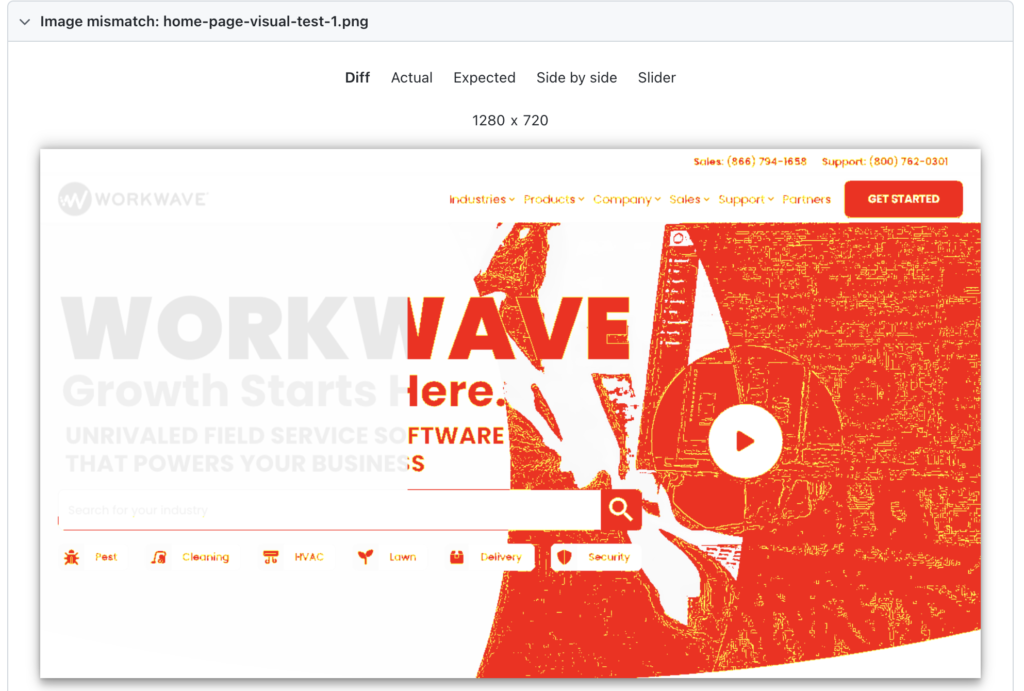
npx playwright test --reporter htmlThe browser opened to a detailed test report, showing a failed result. The “Diff” view highlighted differences between the expected and actual screenshots. Yellow pixels indicated minor variations, while red pixels signified substantial differences.

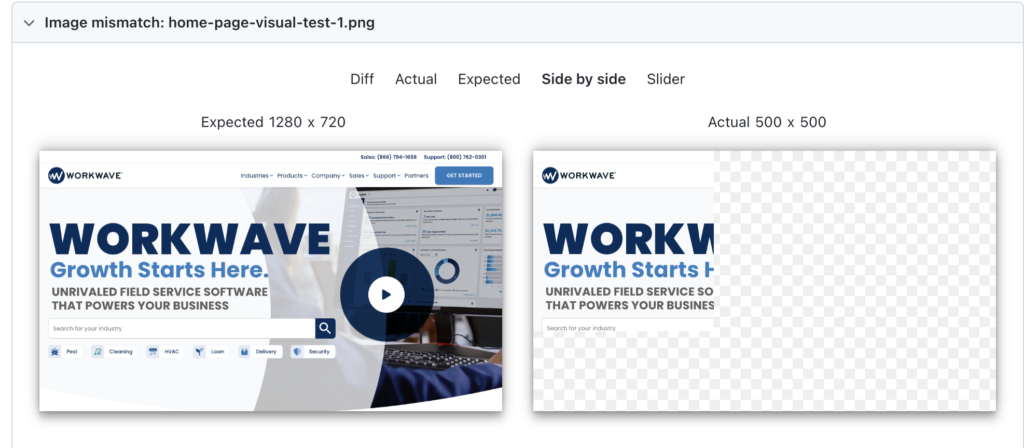
There is also a Side-By-Side comparison option to glance both expected & actual Snapshots together.

Step 6: Using UI Mode for Quick Visual Testing
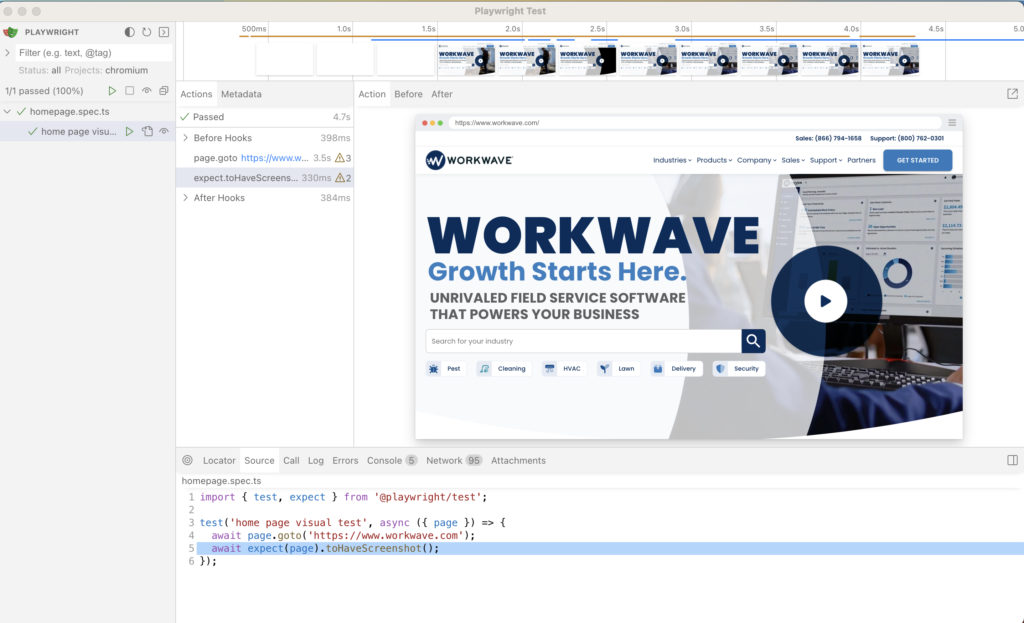
Playwright’s UI Mode was another powerful tool. It automatically snapshots the test after each step, making it easier to spot where to insert visual assertions. Sarah encouraged the team to use UI Mode:
npx playwright test --ui
Real-World Application: Fixing the Disappearing Button
With visual testing integrated into their workflow, the team was better equipped to catch issues early. They revisited the “Submit” button issue. Sarah and her team created a visual baseline after ensuring the UI was perfect.
They automated visual tests in their CI/CD pipeline, ensuring every code change triggered visual tests. This setup compared the new state against the baseline and alerted the team if any visual discrepancies were detected.
The next time the “Submit” button disappeared, the visual test failed. The CI/CD system alerted the team, who promptly addressed the issue before it reached production.
Advanced Techniques and Best Practices
To ensure robust visual testing, Sarah’s team adopted several advanced techniques and best practices:
- Component-Level Testing: They focused on individual components rather than entire pages, isolating issues and speeding up test execution.
- Dynamic Content Handling: They handled dynamic content by ignoring specific areas of the screenshot or using fuzzy matching techniques to allow minor variations.
- Cross-Browser Testing: They ran visual tests on multiple browsers to catch inconsistencies across different platforms.
- Threshold Configuration: They adjusted the sensitivity of visual comparisons by configuring thresholds, avoiding false positives due to minor, acceptable variations.
- Regular Baseline Updates: They regularly updated baseline snapshots to reflect intentional changes in the UI, automating the process to maintain consistency.
Conclusion: The Value of Visual Testing
The journey of Sarah and her team at TechWave Solutions highlights the transformative power of visual testing with Playwright. By capturing snapshots and comparing them against expected states, they could catch visual anomalies early, saving time and preventing user frustration.
Integrating visual testing into their development workflow not only enhanced the quality of WorkWave but also boosted the team’s confidence in deploying updates. As they continued to explore and refine their visual testing strategy, they discovered its full potential in delivering a seamless user experience.
For those keen on diving deeper into advanced visual testing techniques, configurations, and strategies for CI/CD integration, Sarah is on her way to create ultimate series of Visual Testing Guides which will be coming soon, so stay tuned. With these tools and strategies, happy testing became more than a wish—it became a reality.
Interested in learning Docker? Read our new blog series on Docker here.


